Thursday, December 30, 2010

There's a First Time for Everything.

Oh, the mess. The horrible, unbelievable, unholy bloody MESS.
I made Marshmallow Fondant today. It turned out...okay. But now I understand why most people just go out and buy the icky tasting Wilton stuff!

It seemed simple enough to make- first coat every last square inch of surface in your kitchen with a generous layer of vegetable shortening. Every. last. square. inch. Then you melt the marshmallows in a greased bowl in the microwave, and transfer using a greased spoon to your pre-greased mixer bowl with the pre-greased dough hook, and add icing sugar. . . and DO NOT TOUCH THE MARSHMALLOW STUFF! Oh, oh, ohhh.... whatever you do, don't touch the marshmallow stuff. sigh.
Then you mix it until it starts to do this-
No, I'm not showing you what's in the bowl. You don't want to see that.

Next time I do this, (like, when I forget what this time was like to clean up) I will not add all of the sugar at once. I measured everything out by weight, but there was clearly too much sugar. It all crumbled up except for the giant angry glob of Marshmallow Demon that had chemically bonded itself to the dough hook and was refusing to let go. Not enough shortening apparently!


Eventually, after I stopped panicking and running around the kitchen quacking like a rabid duck, I got something that looked like this.

And a whole bunch of crap that looked like this.

I messed around for awhile kneading in more shortening, and warming it in the microwave until it was at least sort of manageable... then threw it back in my poor mixer to add color. Next time (haha), I will add the color to the marshmallow demon before I add it to the sugar.

and then... after some more epic struggle against the beast... we have this. 

Ok, so definitely not Cake Boss material, but for Cake Sass- and a first try- It's bloody magnificent. 


Now. About the Cricut...
After about 2 hours of jacking around and swearing and smoking and experimenting, Tara, Sue and I successfully managed our first USABLE cut. It seems the secret to clean cuts on this beast, is roll it THIN, then FREEZE it solid, then start the cut AWAY from the edge with MEDIUM pressure on SLOW speed. I can understand how so many people got frustrated and returned these things, but I happened to have done enough homework about the CC, to know that only the patient survive. We survived :)

As far as first times go, I think it's great. And I'm sure it will be more fun next time now we have a bloody clue what we're working with!

Happy New Year from Hillbilly Grill and the Cake Sass crew :)

Friday, November 26, 2010

Have your cake and eat it too.

Who says just because you're an "adult" you have to have boring birthday cakes? I just did one for an 8 year old- just the way she wanted it, and this one here is "Just like the kind my Grandma made me when I was a little kid"... So live it up- it's your cake, have it how you want it!

Sunday, November 14, 2010

We asked her what kind of cake she wanted...

"Ummm, I want it pink and purple and yellow and blue and green and red... umm, with a castle and princess Jasmine and Ariel...", "and don't forget the castle".

Ok, so I took a couple days to ponder on that monstrosity, her mom found an Ariel and a Belle, no Jasmine to the ends of the earth... The cake itself was a marbled chocolate with vanilla sprinkle cake, and I think my hand is still cramped from all the over-piping I did on the sides. However, in the eyes of an 8 year old girl, it was clearly a masterpiece, and well worth the fuss if you ask me :)

Happy Birthday Ailish!

Friday, November 5, 2010

...or you could just eat them out of the pot...


I haven't made these in years... that's the best I can do for self control... My brother's wife was feeling inspired and whipped up a batch this week. mmm... LOVES TARA!


  • 1 1/2 cups sugar
  • 1/2 cup butter or 1/2 cup margarine
  • 1/2 cup milk
  • 1/2 cup cocoa, Hershey's
  • teaspoon vanilla extract
  • 3 1/2 cups quick-cooking rolled oats
  • cup flaked coconut
  • 1/2 cup nuts, chopped

    Bring sugar, butter, milk and cocoa to a boil over medium heat. Remove from heat, stir in vanilla. Add remaining ingredients and stir well. (that's usually as far as I get). Drop by spoonful (into mouth) on to wax paper and cool in fridge until set. Store in sealed container.

Wednesday, October 20, 2010

The Lost Art of Stock

One of the easiest things you can make from scratch in your kitchen is stock, or "broth" . Chicken and beef broth are both cheap to make, good for you, and taste infinitely better than the crap you buy at the store! No MSG, no artificial coloring or flavors... and if you're confident of the source of your ingredients, you can support an organic/happy meat claim on the finished product.

You can use your stock to make soups and gravies, you can add it to things like mashed potatos or use it to cook your rice, vegetables and pastas. YAY FOR FLAVOR! And all your friends and family will be so impressed with how "domestic" you are! haha.

This is a "time heavy, labor light" endeavor. You need either all day or all night to make a respectable stock.

So, lets get started.
Equipment- Large stock pot (or slow cooker) with lid, big spoon, ladle, big knife, big bowl, stove (or electrical outlet), colander,  and about 6- 1qt containers with lids (we're gonna freeze ours, if you want to pressure can yours, go call your mother for help).

Ingredients- one whole chicken carcass, (or turkey carcass, or 2 lb beef bones), one whole onion with skin, a bunch of celery with leaves, one whole head of garlic with skin, some carrots with the tops,  half a bottle of (really cheap) white wine (red wine if you're doing beef stock), salt, pepper, assorted spices... (now, when it comes to spices, I like to open the container and if it smells right, I add it).

Put the Turkeysaurus Rex in the pot. If it doesn't fit, take the big knife and make it fit, you have to be able to put the lid on in the end. Quarter the onion and toss that in- skin and all (onion skin gives your stock a nice color). Hack up the celery and add that. Chop the crap out of the garlic and add that. Kill the carrots into a manageable size and throw them in- include the greens too. Pour in the wine- no that wasn't for you to drink! Salt and pepper the hell out of it, add some assorted spices :)

Add water until everything is just covered and start cookin'. If you're using a slow cooker, turn it on low and walk away for 12 hours. If you're going stovetop, turn it on and bring everything to a boil, then reduce heat until it's at a steady simmer ( high enough to keep it simmering, low enough that you can leave the lid on without it starting to boil over). Now, I'm not comfortable walking away from a lit stove for hours at a time, especially with gas, so I make this when I can be home for the day and keep an eye on things. So simmer and ignore for the day...

At the end of the day, when your house smells awesome, remove from heat, carefully remove the carcass/bones and discard (make sure you don't leave the trash where the pets can get at it... unless you're trying to do in the neighbor's dog...) Put the colander right into the bowl and pour everything in. Slowly lift the colander and turf the rest of the solids- after 12 hours, they're all cooked to crap, it's not a waste.
Ladle your liquid gold into containers and let it cool for a few hours- you could put the whole bowl in the refrigerator and then pour into containers. Oh, and LEAVE THE FAT IN!!! Don't skim off the fat! Apparently (particularly in chicken fat), the fat is where all the cold-fighting good for you is! LEAVE. THE. FAT. Phew.

So when it's cooled, secure the lids and pop it in the freezer. I like to stick a piece of tape on each container that has what it is, and the month it was made... not like it's ever around long enough to go bad...

And enjoy! You just made something from scratch!

Monday, October 18, 2010

"It's all Gravy" or "The Secret's in the Sauce"

For some people, gravies and sauces are second nature; for others, they are a mystery. I remember discovering how wonderfully simple it was to make sauces from scratch- that was a long time ago. Since then I have suffered much dismay over how easy it was to TOTALLY SCREW THEM UP!

Have I ever told you about the "Rancid Pork Fat Incident"?

A long long time ago, my husband and I were newly married, and cozily living in our first apartment. I was so pleased with myself and my Mashed Potato Prowess, and my Shake and Bake Chicken Domination. I even knew how to make Gravy from Scratch! Anyway... One night I was making dinner and getting ready to whip up some amazing gravy. I pulled my frying pan out of the oven (we had like one cupboard) and noticed there was some grease in it. I didn't think much of it, in fact I don't think I thought about it at all. I left the grease in the pan and made the gravy. With dinner ready to serve and the gravy simmering in the pan, I decided to have a taste. OH GOD WHAT IS THAT! Whatever it was, it was not edible, it tasted like, rancid something... rancid... Oh! Right! Pork Chops! I had done pork chops like 4 days before. Obviously the grease in the pan had gone "off". GROSS! So I abandoned the gravy, dished myself up and warned my hubby NOT to eat the gravy "It's NASTY! DON'T EAT IT!!" I said.

Before I caught on, he had drowned his plate in the toxic sludge and was shoveling it in his face at record speed.  I begged him to stop, but he insisted it was fine and continued eating. I think he was sick for like 3 days. When I asked him "why the hell would you eat it after I told you it was bad?", he replied "because you made it".

Wednesday, October 6, 2010

Feeding Time

Those of you who know me, know that I am not just a mom of one. My Baby Lust has caused me to add to my brood in a most unusual way. I quit my "JOB" job last December for a number of reasons; lack of affordable childcare being closer to the top of the list. Now I AM the childcare!! I have 6 kids. 3 boys, ages 5, 7 and 7 (and another one whose mom is taking time off for awhile), and 3 girls; ages 5, 7 and 7.

 This "babysitting" business all started when my good friend became dissatisfied with the arrangements she had for her 4 year old daughter. So after thinking about it for a few seconds, I told her "well, I'm not working, I don't have any plans to go back in the near future, why don't you just send the girls to me?".....

One kid led to another, and another, and OMG where did all these children come from!! My home has turned into a ZOO.

And nevermind where they came from, what on earth am I going to feed them?

The palettes of these wee critics are amazingly diverse. One will refuse to eat any kind of fruit whatsoever, but will happily sit down to a plate of raw vegetables and munch all day. Another won't eat fruit unless it's in a smoothie. Most of them will turn their noses up at meat (except of course the tubed variety), and oddly enough, they will usually refuse any kind of sauce or dressing (excluding my own "ketchup headed" son).

So here's a list of what I try to keep in my fridge to get through the twice-a-day piranha attack!


  • Apples
  • Bananas
  • Berries
  • Oranges
  • Yogurt
  • Cheese
  • Hot Dogs (ack)
  • Peanut Butter (NOT in the fridge!)
  • Broccoli
  • Celery (and cheese whiz)
  • Baby Carrots
  • Mann's Sugar Snap Peas
  • Mac and Cheese (yeah baby)
  • Gallons and Gallons of Juice
  • Sliced Deli Ham
  • Whole Wheat Bread
  • Frozen Chicken Nuggets
  • Mini Pizzas
This list is what typically covers Lunch and Afternoon Snack... Dinner time is where I put my foot down; "I am NOT making 6 different dinners for 6 different kids!". And whoever is still here at dinner time can either eat what's served or go hungry until their parents come to take them away. Sounds cold I know, but I assure you, all of the kids are very well fed overall, and there is no danger of scurvy or rickets.

 I don't support all day grazing, demand feeding, and I'm not known to be easy to bargain with- So how do I get the little primates to eat?

The "Options A and B" approach- they think they have some control- if they try for "Option C", they are informed that the only alternative to A and B is nothing at all. That usually settles it.

So kids, you can have carrot sticks and grilled cheese, or ham sandwiches and broccoli. Invariably there are one or two monkeys who like to go against the flow and ask for whatever the other kids didn't want.... I claim the ultimate power of veto. Never, under any circumstances ask the following question "Hey, what does everyone want for lunch?".

Some method to the madness- as follows

  • Yes, kids still think hotdogs cut up in the mac and cheese is awesome. One of the kids hates the cheese sauce so I set some plain pasta aside before adding the magic orange powder.
  • Make a HUGE platter of cut up fruits and veggies, serve on the front porch picnic-style
  • Cut the grilled cheese into finger strips for the "Dip Kids"
  • Serve the veggies before the main dish "you can have your pizza after you eat your carrots"
  • Offer water only at meal times, they seem less likely to chug their whole drink and decide they're too full to finish dinner.
  • Blackmail, Extort, Bribe! Do what you have to do, but be prepared to follow through!
  • Whenever possible, get them to help prepare the food with you, they seem to like it even better when they had a hand (or just a dirty finger) in making it. One of the BEST (maybe one of the messiest) lunches I've done is to get some mini pizza shells, some deli meat, a can of pizza sauce and a bag of grated cheese. They get to build their own pizzas!!
Even the pickiest eater here has come around over time. He tries new things, has finally stopped gagging at the table (this under threat of bodily harm), and does a lot less complaining in general. Yes, he's gone home on an empty stomach a few nights, but he hasn't really suffered for it, and his mother continues to be surprised at the things he's started eating. 

Some days I do two entire dishwasher loads. Some days I just close my eyes on my way through the kitchen. But nobody can ever say they starved to death at my house!

Wednesday, September 8, 2010

Shameless, I Know.

Other than tired, busy, away, lazy, tired, tired and tired, I have absolutely no excuse whatsoever for not posting for the last several weeks. I'm sorry.

Because I know you're all drooling  for my latest kitchen creations, here's some of what I've been up to...
Oh yeah, I've even taken pictures and not posted them! AAARGH!

First, and most recently- I cleaned my sink. Check out Flylady.com. These chicks are awesome. They make me feel so silly for letting my housework slide the way I have. Apparently, it's supposed to be EASY. hahahahahah
Before
After

Now, sad as it may sound, that is the most significant accomplishment of my day so far- after getting out of bed that is.

***

I've also done another awesome cake! Inspired by the countless foodie posts I seem to keep StumblingUpon, I adapted the "from scratch" recipe to fit my lazy assed preference for cake-in-a-box, to create the Original De-Lishes Beer Cake with Baileys Buttercream frosting!
Sigh... I can't rotate the damn picture. You'll get a kink in your neck if you look too long!

So, basically the recipe goes like this...

You take any Devils Food cake mix, and prepare according to package instructions EXCEPT instead of water or milk, you add Guinness or any other stout- be sure not to include foam when measuring. Bake, cool, and don't eat it yet!

The frosting follows my basic version of buttercream icing; one cup butter, one cup shortening, 1tsp vanilla and a crapload of icing sugar- now instead of adding the hot milk, add a good slug of Baileys or any other good Irish Cream liquor. Actually, you could add ANY kind of liqueur. G.Marinier, Amarulo, Kahlua, whatever strikes your fancy I guess! In this case, for extra "POW", I made sure to add too much icing sugar so I could add MORE Baileys!

The cake will bake up super extra moist and fluffy, and the frosting will be DEADLY, and most of your friends will be very impressed! The ones that aren't can go suck an egg- more cake for you!


***

I must have ditched all the other pictures of food... so sad, I had a mean looking French Toast post ready to go! So for now, that's it. Now go make some cake!


Wednesday, July 28, 2010

HAM- 3 Ways from Sunday

Oh, that's not MY ham, it's just a nice picture of a ham because I was too bloody lazy to take pictures of my ham before it was decimated.

So we started out with a store bought cooked ham. It was huge! I was dreading watching the leftovers rot in the fridge over the next week, so I steeled myself for however many days of re-inventing HAM as it would take to make the boys eat ALL OF IT.

So... First you takes the hams....
Put it in a bowl with a bit of water and NUKE THAT BABY while you whip up perogies.
Perogies- boil them til they float, and fry with BUTTER- lots and lots of BUTTER and maybe some bacon and onions if you like.

Tada! You have HAM Lundi! Slice ham and serve hot with the perogies, sour cream, my brother likes mustard on his ham. Freak.

Day 2 "Ham Mardi" (Oh, so the name of the post implies we started on Sunday. It's a Lie. We had ham on Monday).
Right. So.

Take some more HAM. Decide how much they're gonna eat. Spread the slices in the bottom of a casserole. Spread some pineapple slices or chunks on top of that. Sprinkle GENEROUSLY with brown sugar. Bake in a 400degree oven for about 20 minutes- you're waiting for the sugar to melt.
Now, the feedback I got for this dish was great EXCEPT... the pineapple really changed the texture of the ham, and it was "suggested" that if I made it again, to use thicker slices. "Ham Mardi" was served with cheese smothered Tater Tots. I pretended the Pineapple was a vegetable.

OK, I could be clever and call this one "Jambon Mercredi", but that has no ring to it... We shall call it "Hump Day Ham" LOL
Start the night before by soaking 2-4 cups of split yellow peas in a dish (2 cups for 2 grownups, 4 cups if you have 2 grown men and a bottomless pit child).
The next morning, rinse the peas, they will have soaked up all the water and expanded but you want to rinse them to get rid of the whateverthatis that makes them smell nasty.
Add to slow cooker with at least 2 cups of chicken broth/vegetable broth... hell, there's no reason you couldn't use beef broth if you wanted to.
Chop up remaining ham, 1 medium peeled potato, some carrots and celery, salt and pepper, garlic powder, a bay leaf (to this VERY DAY I have never put a bay leaf in anything, and I'm positive I'm not missing out)... whatever spices you feel like. Top up with water so everything's covered.
Slam the lid on and cook on low for at least 8 hours.

Now, I realize that "traditional" pea soup is made with a pork hock, and I'm sure that it tastes SUPREMELY better, BUT... I'm just trying to use up leftover ham... This would go GREAT with my Cheddar Cheese Muffin recipe! Whip them up before dinner for a fresh hot add on to the soup :)


AAAANNNND, if there are leftovers lord help me, they're GOING IN THE FREEZER!

Tuesday, June 29, 2010

CHEESE! MORE CHEESE! MUFFINS! CHEESE IN THE MUFFINS!

Now that I have your attention...
Everybody likes cheese, and everybody likes muffins, so why not make some of these awesome little babies!
There's a good chance I might have to make more of these before dinner. I don't think 12 was enough.

 CHEESE MUFFINS!
  • 1 cup milk
  • 3 tablespoons melted butter
  • 1 large egg, lightly beaten
  • 1tsp garlic puree
  • 1 3/4 cups all-purpose flour
  • 1 tablespoon baking powder
  • 1 tablespoon granulated sugar
  • 1/2 teaspoon salt
  • 3/4 cup grated cheddar cheese
Preheat oven to 350, lightly oil muffin pan, or you could use cupcake liners... I think...

In one bowl, whisk together milk, egg, garlic puree and butter. In second bowl sift flour, baking powder, salt, and sugar. Stir shredded cheese in to dry ingredients. Make a well, pour all liquid in at once, stir JUST until mixed- Muffins need lumpy batter to be muffins!

Spoon into muffin pan and bake for 20-25 minutes.
Try not to burn your face on the oven door waiting...

Eat lots... make more!

Thursday, June 17, 2010

Ham and Cheese Waffles! AND POOETRY!

There once was a man named Lorne
whose Ideas were quite simply foreign
he put cheese in his waffles
and his magic was awful
yet his passing was something to mourn.


Okay, that's enough of that now! Really, "Uncle" Lorne's magic was AWESOME, but awesome didn't rhyme as well as awful. Even as an adult, I have NO idea how he got the candies to pop out of the side of the game table, and his waffles were simply AMAZING. I remember eating waffles until I thought I would burst! I know Nanny has the recipe somewhere... in the meantime, I have to rely on good old BHG cookbook.

So the basic recipe is like this

1 3/4 cups flour
1 tbsp baking powder
1/4 tsp salt
2 egg yolks
1 3/4 cups milk
1/2 cup cooking oil
2 egg whites

Stir together dry ingredients. Beat egg whites separately until "soft peaks" form. In another bowl, beat egg yolks and add milk and oil. Add milk, oil and yolks to dry ingredients and mix lightly (still lumpy). FOLD in egg whites. Don't over mix!

Now, heat up your waffle iron and brush with oil or use cooking spray (cooking spray is gross people!)
While your machine is firing up, chop up your ham bits- I used deli slices- and cube the cheese- about 1cm cubes, if it's too big, well, it will be messy.

Once your iron is pre heated, spoon the usual amount of batter on to the bottom iron, and add about a heaping tsp each of ham and cheese. Slam the lid and wait!

*NOTE* Don't put the ham and cheese on the BOTTOM before the batter. It will all stick to the pan and you will be chiseling burnt ham and cheese and batter off of a hot iron while everyone is waiting for the first batch to hit the table! BELIEVE ME! lol

My son LOVES these. I serve them just like regular waffles- butter and syrup. My husband was slightly more skeptical, but then again, he's the picky eater in the house.

There are lots of things you can add to waffles to make them interesting(er) ( like what's more interesting than waffles!).
  • banana slices
  • strawberries
  • blueberries
  • really, ANY kind of berries
  • different kinds of cheese
  • apples
  • bran or flax 
  • ooh, spinach and feta! 
Mostly though, I like plain cheese.

Now, quit waffling about and go make some waffles!
my camera didn't do justice to the unusual color of the sky... but I'm inflicting the picture on you anyway!

Wednesday, May 19, 2010

UPSIDE DOWN PEANUT BUTTER CUPS!

This is by far, one of my deadliest kitchen experiments EVER!

I had a craving for peanut butter cups- and it all went downhill from there.

All you need for this is
-parchment paper (tin foil would be ok)
-cookie sheet
-chocolate chips or melting wafers or baking chocolate
-good, gooey, unsweetened peanut butter
-icing sugar
-microwave (or double boiler if you want to make work for yourself)
-mixer (stand mixer is awesome, but hand beater is fine)

Add 1 cup of peanut butter and 1/4 cup of confectioners sugar to mixer. Beat on medium until the PB turns into a firm "thumpy" ball - yes I said thumpy- you want it to stick together and stop sticking to the bowl.
If you need to, add more sugar until you get the desired thumpiness.

I love that new word :) thumpy thumpy thumpy. My spell checker is having a cow.

In a microwave safe bowl or double boiler, melt about 2 cups of chocolate. If using a microwave, cook for short 15-20 second intervals... you can burn chocolate!


Line your cookie sheet with parchment paper or foil, and spoon small (twoonie sized) pools of melted chocolate onto the paper (about 2 tsp chocolate at a time)
Then, use a spoon to make balls of peanut butter mixture, about the size of a cherry. Use your hands if you need to, just don't get peanut butter on your digital camera (oops). The rounder the ball, the easier it is to put the top coat on.
I ended up having to melt a bit more chocolate to put the top on- it's better to start with not enough, otherwise you're left with a giant bowl full of melted chocolate with a spoon in it.... well I guess that's better...
Spoon chocolate over the top of the peanut butter, try to cover as much of the peanut butter as you can, but not with so much chocolate that it starts spreading onto the base.
Once they're all coated, pop the whole tray into the refrigerator- they should only take a few minutes to "set", and maybe 1/2 an hour to firm up the PB.
Package carefully and store in refrigerator- they'll get eaten LONG before they'll go bad! I used squares of parchment to separate them. You could use cupcake liners, but then you may as well have used them in the beginning and they wouldn't be upside down peanut butter cups now would they!

Enjoy!

Monday, May 17, 2010

Mr Magic Eraser, Meet My Stainless Steel Pots!

Ah, the best trick of the week! I have these GORGEOUS Kitchenaid stainless steel pots and pans that my FABULOUS husband bought me for my birthday a few years back, but let me tell you, "stainless" is a LIE!

In a fit of desperation I took the Magic Eraser to my saucepan, and with relatively little elbow grease, the pan scrubbed up like new! It's a good thing!


Now, before you get all antsy, here's what I really came to write about


PIRATE CAKES!!
Sam's cake!
Black forest cake with whipped cream topping, painstakingly hand drizzled dark chocolate palm trees, and a treasure map design on top!
Oh, and not NEARLY enough candles! lol

AARON'S CAKE
Marble cake with buttercream icing- there started to be piping decorations around the sides, but alas, my kitchen was too warm, and I'm just not bloody fast enough! The Chocolate art was again, done by hand, late at night by a crazy lady with a spoonful of melted chocolate in her mouth to keep her hands steady :)
That WAS a ship on the cake, but the sail never survived the move to Emma's house, and the candles (again, not enough by a long shot) turned the whole thing into a "shipwreck" cake.


All in all, the cakes were really tasty, and very much enjoyed by everyone there. Next year, they're gonna share a big ass sheet cake with "HAPPY BIRTHDAY" stuck on top in pre made lettering! haha

Thursday, May 13, 2010

In case of emergency, fry with butter and garlic.

Every once in awhile, I get adventurous...

I'll be out shopping in the produce section, and I'll see a bunch of fresh, nice looking vegetables that aren't on our regular menu and buy some.

Then I get them home and they sit in the fridge, getting less and less fresh and eventually not so nice looking, because I have no idea how to prepare them.

I've since discovered, that just about all of these interesting veggies will totally taste good sauteed in butter and garlic. You can use olive oil for the longer cooking foods, as butter will burn; you can add black bean sauce or hoisin or teriyaki; you can add meat (start the meat first)...

Stir fry over rice or noodles is quick, tasty, healthy, and usually a crowd pleaser.

and that's about all I have to say about that today.

Monday, May 3, 2010

Things that are really, really, bad for you...


There is nothing quite like the Internet when it comes to vast and indigestible quantities of useless information. However, I've learned some pretty important things about what we put in our mouths, feed our kids even, and never think twice about what's in it! Tobacco has NOTHING on the things in this list!

First and probably the nastiest- BPA "Bisphenol A (BPA) is a widely produced chemical used primarily for the production of polycarbonate plastics and epoxy resins." -http://www.medicinenet.com/plastic/page4.htm#bisphenol. BPA is what makes our plastic containers clear and nice to look at. Most plastics with the number 7 on the bottom with the recycle symbol has it. BPA leaches into our food and when ingested in high enough quantities, it begins to behave as a synthetic estrogen... eeew. They used to make those clever and "environmentally friendly" nalgene bottles with it. Prolonged consumption of BPA can cause hormonal imbalances, early onset of puberty in children, obesity, and may be linked to some types of (estrogen fed) cancers. The sneakiest product containing unsafe levels of this chemical is CANNED TOMATOES. They use a BPA laden resin to coat the tin in order to prevent the acid in the tomatoes from eating through the can. Instead, the acid eats away at the resin and releases the chemicals into the fruits. There is enough BPA in one can of tomatoes to impact your health. Imagine you are cooking with canned tomatoes once a week? Feeding it to your kids?
The solution is fairly simple. Ask your favorite grocery chain to start carrying "canned" tomatoes in glass. Here is a list of what I can find on the net.
  • Nativa organic pasta sauce bottled in glass jars at Shoppers drug mart.
  • Heinz ketchup still comes in glass bottles
  • Bottled tomatoes $1.99 at Sobeys.
If you can't find anything economical or practical, you may want to consider canning your own tomatoes (I'm on it this summer for sure). If that seems overwhelming or you don't have any equipment for canning, consider asking some like minded friends to go on a canning spree for you. Ask your grandma (or equivalent) if she would mind showing you and your friends how to do it. Most Grandma Types are more than happy to pass on the knowledge :)

Yet another horror of the commercial farming industry would be POTATOES! No, really! Potatoes!
Potato farmers won't even eat the potatoes they sell, instead, they grow a separate plot for themselves. Being a root vegetable, they absorb whatever is in the soil and hang onto it so we can eat it. Commercial potatoes are drenched with fungicides to prevent rot, then before harvest, sprayed with herbicide to kill off the vines, and treated yet again to prevent them from sprouting. It's easy to find organic potatoes, and they aren't that much more expensive. For your health, it's definitely worth it. source http://lifestyle.ca.msn.com/health-fitness/diet/rodale-gallery.aspx?cp-documentid=22463436&page=4

Next up is fish. We are supposed to eat more fish for the omega fatty acids, which are important for heart health and brain function- but what the hell kind of fish are we supposed to eat? In one breath they're telling us to eat more of it, and in another, they're on and on about mercury and PCB's and a myriad of other contaminants. Fish is good for you, but you have to be savvy of the source. Read the package, for example; "Atlantic Salmon" is almost certainly farmed. Instead, look for "fresh caught wild Atlantic salmon" . Ask the guy behind the fish counter to help you choose. I live in an area that is densely populated with people from the East coast, and almost all of them are descended in some way from fishermen. They know their fish, and not one of them would be caught dead eating farmed fish. If you can't be bothered with all the choosing and checking, just buy canned fish. It's almost always fresh caught, as it's not economical (yet) to farm for mass production. So long as you're not worried about eating cute baby dolphins with your tuna :)

Now, the last thing I'm putting on the list is (and I really don't want to do it) is MILK.

I drink milk. My family drinks milk. We are NOT ever going to stop drinking milk... but...

"Milk producers treat their dairy cattle with recombinant bovine growth hormone (rBGH or rBST, as it is also known) to boost milk production. But rBGH also increases udder infections and even pus in the milk. It also leads to higher levels of a hormone called insulin-like growth factor in milk. In people, high levels of IGF-1 may contribute to breast, prostate, and colon cancers. "When the government approved rBGH, it was thought that IGF-1 from milk would be broken down in the human digestive tract," says North. As it turns out, the casein in milk protects most of it, according to several independent studies." (source http://lifestyle.ca.msn.com/health-fitness/diet/rodale-gallery.aspx?cp-documentid=22463436&page=6)... ARRRGH! PUS IN THE MILK! PUS IN THE MILK! Never mind the bloody cancer! PUS. IN. THE. MILK. Sooooo, maybe it's time to start reading the labels on the milk jug. You may even want to turn the jug over and make sure it doesn't have BPA in it.

Oh, I hate to rain on our food parade, but I have to say, it concerns me. I try hard to get the right amount of servings of the right amount of stuff into my family, and to discover that I'm also serving them fungicide, artificial hormones and UDDER PUS... well it's enough to drive a woman to farming.

Tuesday, April 27, 2010

HA! That'll Teach Him! (well, probably it wont...)

So, I've been nagging my husband to do a few things around the house for, well, for ever. Of course, home maintenance is somewhere down the list after "go for a walk" and possibly even after "back waxing"... suffice it to say, there is not a lot of hope that he'll ever get some of these things done.

This leaves me with three options; Pay someone else- I'm too cheap to do that, Coerce someone else- the other wives are starting to wonder why the menfolk are all over here fixing things instead of sitting at home NOT fixing things, OR I can do it my own, Elisheba, self. eeeeeek!

Ok, FINE, I will install my own coat hooks!

So here in the first picture, you can see I am using the very scientifically sound method of "eyeballing" it. I notice that the hooks are pretty much exactly as wide as the whatchamacallit in the door! How convenient!


Now that I'm pretty sure it's centered-ish, I'm gonna use some painter's tape to hold it up there while I go find the drill! Painters tape is GREAT, cause it comes off nicely when it's done :)


Found the drill, and got the first and second screw in without breaking anything OR hurting myself! YAY! But wait, the third screw is defective and the drill bit won't go into it far enough to turn it... Oh well.
TaDa! Now we can hang up our "wear them all the time" coats and the doggie stuff without having to worry about avalanching all the other stuff in my closet!
Oh yes, I am REALLY impressed with myself!
I just wanted YOU all to know how awesome it is to do it yourself (once in awhile)...

Saturday, April 24, 2010

Not just for Fish&chips


Although, I prefer malt vinegar for my battered ocean goodies... Plain white vinegar is a wonderful thing to keep around the home.

Beyond your Nana using it to clean the windows with wads of newspaper, here are 3 good uses you might not have thought of...

  • Sprinkle or spray on pet messes after initial clean up, even after you can't smell the vinegar, your dog can and they won't want to use that spot again ( you may as well hose all your floors with the stuff and be done with it)
  • Replace buttermilk in recipes- add 1 tbsp to scant 1 cup of milk to "sour" it, this is standard for pastry, but you can do this for buttermilk biscuits and pancakes too.
  • "Fix" the dye in an over-dyed garment- when you're tired of that pretty red blouse turning everything pink, toss it a sink full of cold water and 1/4 cup of white vinegar. Gently agitate by hand and leave to soak overnight. After soaking, rinse garment well, and hand wash with gentle detergent. If it's still "bleeding" you can repeat the process.
There's a gazillion lists on the net for using vinegar to clean, so I won't repeat them all here, but these 3 didn't come up anywhere I looked! So there, you learned something new!

Wednesday, April 21, 2010

My Marvelous Muffin Making Method Minus Muffin pans.


Oh, I'm sorry, I couldn't help myself :D

I noticed the other day that among other things, I have permanently misrelocated my muffin pans. I haven't seen them in AGES. So last week I made muffin batter and stuck it in a mini- loaf pan, and while it was tasty, it just wasn't the same.

Again today, I had an urge for muffins (banana pumpkin to be precise), and wondered whether I could make them like this (see pictures).


Any old baking pan will do but I opted for two of my straight sided small cake pans.
It's probably not such a good Idea to over fill them.
I guess there's no rule that muffin bottoms HAVE to be perfectly round! And if there were such a rule, I would laugh in the face of said rule, and say- FINE! I'm not sharing my gimpy banana pumpkin muffins with YOU!


bwaa haa haaaaa!

Tuesday, April 20, 2010

"What is that purple thing in the refrigerator? You aren't going to make me eat that are you?"

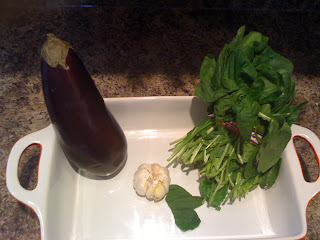
Well dear, it's an Eggplant, and it's actually a kind of berry, and no, I bought it so it could rot in there.

That was my grown husband, not my son.


I bought an eggplant last week because they were there, and I love fried eggplant and zucchini and polenta. The guys won't touch the stuff, and I wouldn't share it if they did. Unfortunately, the zombies at the store had never even heard of polenta, never mind knew where it might be, so me and my eggplant went home to stare at eachother until I could figure out how to do it in.

"Hubba Ghanouj"- this experiment turned out WAAAYY better than the Chikin Pancakes ;)


1 whole regular eggplant, unpeeled
5 cloves garlic (NO LESS)
1 cup chopped fresh spinach
1/4 cup of olive oil
pepper
salt

coat the bottom of your casserole with a generous amount of olive oil, chopped garlic, half the chopped spinach, salt and pepper. Slice the eggplant lengthwise and layer in the dish. Baste the topside of the slices liberally with remaining olive oil, more garlic, salt and pepper, and toss the rest of the spinach on top.


Bake in 450 degree oven for 25 minutes.


Let the whole lot cool down enough to handle it, dump it ALL into a large bowl (or your blender or your food processor), and murder it to death. You want to blend all of the ingredients into a puree.
Add 1 cup of plain yogurt or sour cream.


Cover and refrigerate. The longer it waits, the better the tastes will blend.

you can eat it with flatbread, or tortilla chips, and its ALL good for you!


Thursday, April 8, 2010

Really Yummy


Say Hooraaaay! It's a FOOD post!


Sorry, nothing clever to talk about today, also, I had to change the template back- I just couldn't stand not having the dashboard link at the top. I'm wiped out, and the 2 kids I have today are proving to be more work than the 4.5 I had yesterday! Go figure! The weather is kinda crummy, I'm stiff from my workout last night, and all I can think of at the moment is food.


My cholesterol 'issue' has made eggs into a Big Bad No-No, but I loooove eggs, and now I'm craving eggs, and today Imma gonna EAT eggs!


Egg Salad on English Muffins- open faced


  • Boil 2-3 eggs for 5 or so minutes (really, I just guess when they're done. I have to get one of those thingys that you stick in the pot and it changes color when the eggs are ready)

  • Cool the eggs by leaving them under running water for a bit

  • peel the eggs

  • now, if you're trying to avoid cholesterol poisoning, you can actually take the yolk out! I left them in today

  • slice them into a bowl

  • add 2 tbsp mayo/miracle whip/"mayonnaise type dressing"

  • 1/2 teaspoon mustard

  • handful of chopped green onion

  • salt and lots of pepper

  • toast and butter english muffin

  • squish the eggs and stuff together

  • put it on the toast....

total prep time is only 10 minutes, though I really prefer COLD egg salad on hot buttered toast. Doing it all at once means the eggs are still warm, and you might not like that.


Also, it doesn't hurt to boil up 6 or so eggs and keep them in the fridge (good for about 5 days). You can add them to salad, send them in lunches or just snack on them with a little salt shaken on.


mmmmm eggs!

Oh, and keep the eggs covered in the fridge- or your whole fridge will smell like boiled eggs... they taste better than they smell.

Wednesday, April 7, 2010

Recipe for a Day with 4 Kids


No, this doesn't really have anything to do with food... suck it up


To successfully entertain 4 children between the ages of 4 and 7, you will need (at the very least) the following things. This is an elaborate recipe, though it seems that the more ingredients you add, the easier it is to make :)
Stage 1
4 kids
1 friendly (if a little weird) neighbour kid
Some washable paints (don't be cheap, buy crayola, you want to know that it WILL wash up!)
5 paint brushes
5 really big sheets of paper
10 small plastic containers
2-15 rags- depending
3-5 old t-shirts
As many crayons, markers and coloring things as you can find
1 large tile kitchen floor.


Send kids into the kitchen, hand out containers of paint and water, show them what the rags are for. Cover each kid from neck to elbows to knees in old t-shirts and set them loose.

While you await the screams of anguish (they are sure to come), or the exclamations of a finished masterpiece, do Farm Town.

Stage 2
You will need
1 reasonably nice day
1 reasonably dry yard
some bicycles and helmets
Sand toys or more old containers
Again, the strange neighbor kid makes a good addition
Clear and definite boundaries of play in ALL DIRECTIONS


Sit back, do some more farming, then make lunch...


Lunch

First send neighbor kid home- her parents make good money, they can feed her.
Go over mental list of what each kid will and will not eat.
Make Mac and Cheese
While mac and cheese is cooking, cut up fruit and veggies and pour into trough ;)
Serve mac and cheese, with or without ketchup


after lunch, hold each kid individually under warm soapy water- don't worry, the more they thrash, the faster they get clean. Shake vigorously to dry.

Stage 3.
Believe it or not, by now they are probably ready to sit quietly for awhile!


Now, this part is important- ARBITRARILY decide what movie they are going to watch. Go for majority satisfaction, and make age appropriate for the youngest one in the group.
Turn movie on.


Spend the next 15-20 minutes shovelling out the trough, wiping the paint off the kitchen floor, unloading and reloading the dishwasher, shaking the dirt out of shoes, picking up toys and containers... and when you're done that, you might have just enough time to check your email before they are all bouncing around bored again! :)


How well this recipe turns out in the end depends on a variety of factors; almost none of which are under your control. You may make it once and it turns out beautifully, and the second time might blow up in your face. Be prepared to roll with it whatever happens, and maybe take a Xanax... :)


Have fun!